

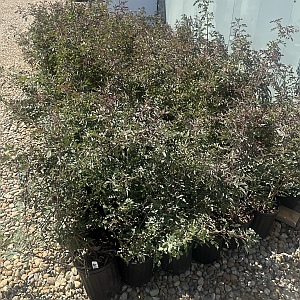
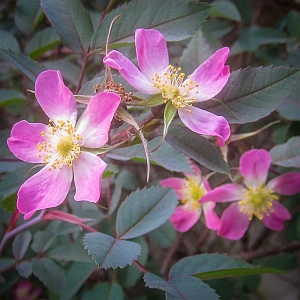
Rosa glauca (also known as the red-leaved rose or Rosa rubrifolia) is one of my all-time favorite roses. It’s a graceful, upright-growing species rose prized as much for its foliage as for its flowers. Its distinctive blue-gray leaves are flushed with burgundy and purple tones, creating a smoky color that stands out in the garden from spring through fall. In early summer, Rosa glauca produces small, single pink blossoms with bright yellow stamens. The real treat comes later in the season, with abundant orange and red hips that bring color to the garden well into winter.
Rosa glauca is hardy, adaptable, and tolerant of poor soils, making it an excellent choice for xeric plantings, hedgerows, and mixed borders where its unique foliage can complement both perennials and other shrubs.
Unfortunately for those of us on the nursery side of things, Rosa glauca is notoriously difficult to propagate from vegetative cuttings. As a result, we rely instead on seedlings sprouted from the plant’s hips. Physiologically, Rosa glauca tends to have lower natural levels of endogenous rooting hormones (auxins) and responds only marginally when synthetic hormones are applied during the cutting process. As a result, it has evolved to reproduce effectively by seed in its native habitat and we follow that same path in greenhouse production.
To be completely honest, for the last 10 to 15 years we have let this process happen completely naturally in one of my sister Heather’s display gardens in Utah. Birds happily lent a hand by eating the hips, digesting the outer flesh, and depositing the seeds in the ground. The birds were surprisingly accurate too, as seedlings would sprout within a couple of feet of the hedge. All that was left was me crawling around on my hands and knees to harvest them. With age diminishing both my eyesight and my mobility, it was time to look germinating the seeds in a little more deliberate process in the greenhouse.
Here is a rundown of our first attempts at collecting and germinating Rosa glauca seeds in the greenhouse.
The Process
1. Harvest the Hips Timing is everything. To begin with, do not prune the rose after it blooms. The rose hip, or fruit, forms as part of the plant’s sexual reproductive process and occurs after the rose’s flower has dropped it’s petals. The flower is a conduit to the pollination process and a successful fertilization results in viable seeds. We let the hips develop on the plant until September or October, when they’ve ripened to a nice orange-red color.
2. Collect the Seeds Collecting rose seeds requires cutting into the harvested rose hips and removing them from the fruit. The outer fruit of the hip actually inhibits germination of the seeds. To illustrate, think of what happens to a seed as it passes through a bird’s digestive system. Once the seeds are isolated, we rinse them and perform a buoyancy test to identify which are fertile. Fertile seeds sink to the bottom; unfertilized ones float. We discard the floaters.
3. Cold Stratification Exposing seeds to the cold for a prolonged duration is a critical success factor in the germination process. Once the seeds are seeds are harvested and buoyancy tested, we pack them into large Ziplock bags mixed with perlite. We add couple of tablespoons of water added to keep things from drying out completely. The sealed bag goes into the refrigerator for at least 8 weeks, simulating the seeds overwintering in the ground.
4. Sow the Seeds Now the fun part begins. After removing the seeds from the refrigerator, we move the process to the propagation area of our green house. To create the germination environment, we use a standard square nursery trays with a mesh bottom. We start with a 1-inch bed of high-porosity (fast-draining) potting soil in the bottom of the tray, sow the seeds on top, and cover them with about ¼ inch of additional soil. We try to space the seeds evenly with about a 1/4″ to 1/2″ gap between them.
5. Wait Once everything is watered in, we place the trays on our mist propagation benches. If our misting system is running in the greenhouse, we mist the seeds roughly once per hour. Otherwise, we cover the trays to retain moisture until sprouting begins. This stage typically takes 6 to 8 weeks for the first seedlings to emerge.
6. Transplant Once seedlings reach 3 to 4 inches in height, we move them into 1-quart (5″) finished pots to begin fully rooting out. From hip harvest to finished plant, the entire process typically takes 8 to 12 months.